Open-sourcing our Raspberry Pi Displayboard

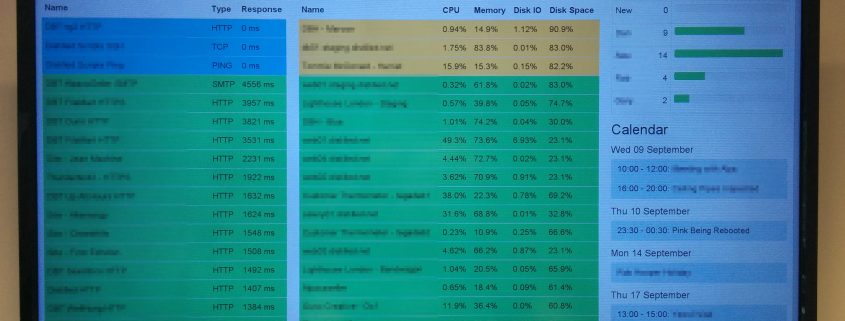
Our office warboard runs off a simple Raspberry Pi plugged into a wall mounted TV however the code to get this to work reliably has taken a bit of tweaking over the years.

Today we continue our efforts to give back to the open source community by publishing our recipe for a solid, stable displayboard that can be used for anything from digital signage to office displays.

You can find all the code in our pi-display GitHub Repo.

This code…

  • Waits for the TV/display to be turned on before proceeding.
  • Reconfigures the resolution to match the best resolution the TV/display has to offer.
  • Fixes itself and any bad configuration should corruption occur from a bad webpage.
  • Works with the latest SSL technologies (TLS1.2).
  • Supports CEC commands allowing you to control the TV via the HDMI cable.
  • Installs fonts required for correct webpage rendering

Our office warboard is not only locked down to certain IP addresses but also uses the latest SSL protocols and ciphers. The stock chromium on Raspberry Pi wasn’t up to date (v22 when the current version is v51) and didn’t support the latest security protocols.

This repo used to use the epiphany browser instead which was more up to date (but not as stable). Now (28 Sep 2016) the Raspberry Pi team have released PIXEL which includes a much more up to date version of the Chromium browser.

This install also downloads and compiles the latest cec-client that allows you to turn the TV on and off each day via cron.

Let us know if you find this useful and feel free to fork and/or make pull requests 🙂

Types of SSL Certificates

The number of businesses that use SSL have increased tremendously over the past few years and the reasons for which SSL is used has also increased, for example:

  • Some businesses need SSL to simply provide confidentiality (i.e. encryption)
  • Some businesses like to use SSL to add more trust or confidence in security and identity (they want you to know that they are a legitimate company and can prove it)

As the reasons companies use for SSL have become wider, three different types of SSL Certificates have been established:

  • Extended Validation (EV) SSL Certificates
  • Organization Validation (OV) SSL Certificates
  • Domain Validation (DV) SSL Certificates

Extended Validation (EV) SSL Certificates are issued only when a Certificate Authority (CA) checks to make sure that the applicant actually has the right to the specific domain name plus the CA conducts a very THOROUGH vetting (investigation) of the organization. The issuance process of EV Certificates is standardized and is strictly outlined in the EV Guidelines, which was created at the CA/Browser Forum in 2007, specifies the required steps that a CA must do before issuing an EV certificate:

  1. Must verify the legal, physical & operational existence of the entity
  2. Must verify that the identity of the entity matches official records
  3. Must verify that the entity has the exclusive right to use the domain specified in the EV Certificate
  4. Must verify that the entity has properly authorized the issuance of the EV Certificate

EV Certificates are used for all types of businesses, including government entities and both incorporated & unincorporated businesses.

A second set of guidelines are for the actual CA and it establishes the criteria to which a CA needs to be audited before being allowed to issue an EV Certificate. It is called, the EV Audit Guidelines, and they are always done every year to ensure the integrity of the issuance process.

  • Takes 7-14 days to provision
  • Expect costs to be at least £150+
  • Gives a green bar in the browser

We recommend EV certificates if you are asking for sensitive details such as credit card information on your website.

Organization Validation (OV) SSL Certificates are issued only when a Certificate Authority (CA) checks to make sure that the applicant actually has the right to the specific domain name plus the CA does some vetting (investigation) of the said organization.  This additional vetted company info is displayed to customers when the Secure Site Seal is clicked on, this gives enhanced visibility to who is behind the site which in turn gives enhanced trust in the site.

  • Takes 1-3 days to provision
  • Expect costs in the range of £40 to £100

Perfect certificate for any businesses website.

Domain Validation (DV) SSL Certificates are issued when the CA checks to make sure that the applicant actually has the right to the specific domain name.  No company identity information is vetted and no information is displayed other than encryption information within the Secure Site Seal. DV certs can be issued immediately.

  • Instant provisioning
  • Usually around £10. However notably Lets Encrypt provides free certificates

This is perfect for securing every day websites like blogs.

Adding Google Analytics tracking to WordPress via a plugin

Before we start you will need a Google Analytics account.  See our other guide for setting up a Google Analytics account.

There are many Plugins that add Google Analytics to a WordPress site. Some will add Google Analytics reports into your WordPress site admin interface and other will just push your site’s data to Google Analytics meaning you have to view it on the Google Analytics website.

For this post we are installing Google Analytics Dashboard for WP.  As with any Plugin you need to consider security.  Look for Plugin’s that have had lots of downloads and good reviews and also that have been updated within the last 6 months. Plugin are made by anyone with programming skills and like most things people lose interest or run out of time to keep their made plugin secure and updated.  An insecure plugin could be the way hackers get into your website and cause issues.

To install Google Analytics Dashboard for WordPress:

  1. Log into your WordPress site (www.example.co.uk/wp-admin)
  2. On the left hand side go to Plugins and click Add New.
  3. Search Plugins in the right hand corner of the page for ‘Google Analytics Dashboard for WP‘ and click Install Now.Google Analytics Dashboard for WP
  4. On the install page click Activate Plugin – you will now see Google Analytics on your left hand menu
  5. Select Google Analytics – General Settings and click Authorise Plugin
  6. Click the red link (Get Access Code) on this page to generate and get your access code. A new window will pop-up asking you to allow specific data from your Google Analytics account to be used by Google Analytics Dashboard for WP. After agreement, an access code will be provided.
  7. Copy the code, paste it in the field called Access Code and save it by pressing the Save Access Code button.
  8. Once set up please be aware it may take up to 24 hour for data to appear in your reports.

You are now set to explore and set up Google Analytics Dashboard for WP as you wish. For more information and a more in depth video on how it works please visit the Google Analytics Dashboard for WP Documentation, Tutorials and FAQ page.


How to set up Google Analytics for your website

There are three parts to setting up Google Analytics to start collecting basic data from your website.

  1. Create a Google account or activate (access) Google Analytics on your existing google account
  2. Set up a property in your google account.
  3. Follow the instructions to set up web tracking

Only you as the website owner can set this up as it comes under your personal google account so your web host or developer will not be able to set this up for you. However it is very easy to do and a simple guide is below:

Create a Google account or activate (access) Google Analytics on your existing google account

First you will need to create a Google Analytics account. To do this, visit Google Analytics Signup Page.

If you already have a Gmail/Google account, then use that to sign-in with. If you do not have a Gmail/Google account, then you will have to create an account for yourself.

If during the sign in/up process you end up on the wrong page just visit https://analytics.google.com/ to get you back on the right page.

Set up a property in your google account

Once signed into your Google Analytics go to the ADMIN tab along the top of the page

In the ACCOUNT column, use the dropdown menu to select the account to which you want to add the property.
In the PROPERTY column, select Create new property from the dropdown menu and select website.

Tips for completing the form

Website Name: you can simply use your URL if you wish.

Website URL: just type in your website address! Select the protocol standard (http:// or https://). Enter the domain name, without any characters following the name, including a trailing slash (www.example.com, not www.example.com/).

Industry Category:  this is optional and can be left blank if you struggle to find an appropriate category for your business.

Reporting Time Zone: Pick your time zone. This is key for making sure the way Google Analytics counts days lines up with your own business day.

Data Sharing Settings (if shown): completely optional. Select and deselect as you feel comfortable.

Click the blue Get Tracking ID button. Your property is created after you click this button, but you must set up the tracking code to collect data.

Follow the instructions to set up web tracking

There are several ways to collect data in Analytics, depending on what you want to track. This Set up Analytics tracking guide gives you the instruction on the best installation method for what you wish to track.

If you are using WordPress please refer to our Google Analytics for WordPress post.

Whatever method you use to set up Google Analytic please be aware it may take up to 24 hour for data to appear in your reports.

HashGate

HashGate: An intrusion detection tool

HashGate is a simple intrusion detection tool we wrote for use internally and in customer environments to monitor files and alert us on any unauthorised changes to them.

We try very hard not to re-invent the wheel and are already big users of tools such as Tripwire and Rookit Hunter but we wanted something lightweight for monitoring site files, not system files.

HashGate is written in Python using only core modules and aims to work on all platforms that can run Python 2.7, not just Linux!

Our main use for HashGate is for monitoring files on WordPress & Magento installations which more commonly are exposed to vulnerabilities allowing hackers to modify files. HashGate records the hashsum of all files in the specified directory and stores them for checking periodically, we run our checks hourly via cron.

Below is an basic example output where a file has been modified:


alex@dogsbody-alex:~$ ./hashgate.py -ca /tmp/files.cache -f /home/alex/Documents/Junk/ -t check
The following files were modified:
/home/alex/Documents/Junk/wordpress/index.php
----------------------------------

Other features of HashGate include whitelisting, which allows us to ignore files that frequently change and don’t need to be monitored such as WordPress’ cache files or Magento’s sessions directory.

There is also VirusTotal checking, this is where HashGate will check flagged files hashes against VirusTotal’s database of malicious files to determine if the change was malicious or not. Due to the nature of VirusTotal’s API we’re only able to do 4 requests per minute so if lot’s of files are flagged it will add some extra time to hash checks.

We have recently open sourced this tool and you can find some more information and a list of the full features and usage in the Github repo, if you feel something can be written better or there’s a feature you’d like to add we invite you to contribute and help us build a better tool. We make use of tools like HashGate in some of our server monitoring packages so be sure to check them out and get in contact if they could be of use.

Pushover Alerts

Alerts & Webhooks with AWS Lambda

Here at Dogsbody Technology we monitor servers and services for hundreds of clients, you may have read our previous blog post talking about our Warboard and how we make use of it. This blog post covers the other tools we use for responding to incidents and issues real time, our Dogsbody Technology Webhooks.

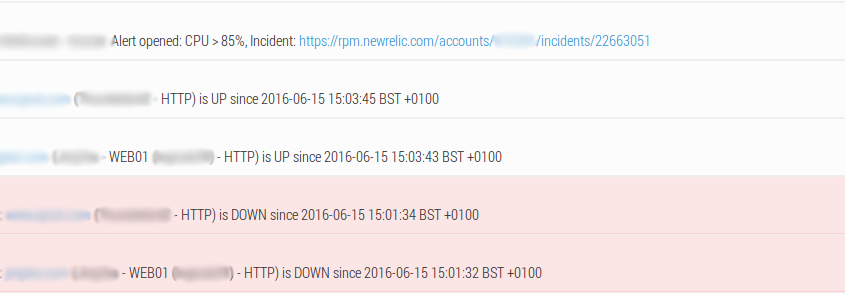
The main thing we use the webhooks for are Pingdom, Newrelic & Sirportly alerts. When an incident is triggered in Pingdom or Newrelic they will make an API call to our webhook with the relevant information we require to investigate an incident, the webhook will then determine the priority of the incident and send an alert to our Pushover user accounts so we are alerted and can respond to the incident.

High priority alerts, such as site outages also trigger a rotating blue police style light which is accompanied by a siren sound from the office speaker.


Office Siren

The Dogsbody Technology office siren


We also use the webhooks to notify a user when certain interactions happen in our ticketing system Sirportly, such as being assigned a new ticket or when one of their existing tickets is replied to.

To ensure our webhooks would have near to 100% uptime and we wouldn’t miss an alert, we decided the best place to host them would be using AWS Lambda & AWS API Gateway. These two services combined allow us to run the webhooks with Amazon’s high availability infrastructure while only paying small amounts on a per request/alert basis, which is the perfect type of model for this service.

To put into perspective how cost effective AWS’ pricing model for our alerts is, last month (June 2016) we received 25,282 alerts for all of our endpoints combined. This worked out at a total monthly cost of … $0.10! AWS actually provide you with a free amount of lambda execution time per month which we haven’t even reached yet, we’re only getting charged that 10 cents for the API Gateway.

Let us know if you find any of the services and technologies mentioned above interesting and we can write some more in-depth blog posts on those subjects, and even some guides on using them. The alerts talked about in this blog post come with the majority of our server monitoring packages, so be sure to get in contact if you need any of our services.

Let’s Encrypt: Security Everywhere

Let’s Encrypt is a new Certificate Authority (CA) who are making waves in the web community. They have lowered the access barrier for SSL certificates significantly and are pushing their competition to improve; fast.

“A Certificate Authority is an entity that validates other digital certificates… …Creating a Chain of Trust between a website and the browser.”

Read more about Certificate Authorities or how to trust over the Internet.

Why Lets Encrypt is revolutionary:

  • Let’s Encrypt removes the pay wall for SSL certificate’s making them free for everyone.
  • Its quick. Seemingly instant certificate authentication and provisioning.
  • Open client options for many different programming languages and environments.
  • Certbot (the official client, developed by the Electronic Frontier Foundation (EFF)) is incredibly simple to set up and run HTTPS in seconds. See for yourself.
  • Automated SSL regeneration. A new certificate just when the old one expires.
  • Raising the standards for CA security checks. Let’s Encrypt have implemented new security checks which ensure that you are the domains owner and that it’s secure to issue you the certificate. Read more.
  • Short validation periods. Let’s Encrypt certificates are only valid for three months which in comparison to other CA signed certificates is shorter. You may be thinking this is bad, long validation periods means less work to maintain. But should the next Heartbleed vulnerability come along and your certificate is leaked to the public, the perpetrator only has less than three months to use it then it will no longer be valid.
  • Supported, as of last year Let’s Encrypt are trusted in most browsers. Test it for yourself. Read more.

It’s free, easy and simple to do so there is no reason not to get started straight away.

Quick (nearly instant) certificate provisioning is our favourite benefit. We often have new customers come to us that have been caught out by expiring SSL certificates not leaving enough time for the renewal to take place, which with Extended Validation certificates can be weeks! Let’s Encrypt is our first port of call to mitigate the missing certificate. Giving us a temporary solution while their other certificate is renewed.

At Dogsbody Technology we love SSL and have already started implementing Let’s Encrypt when we can. If you want to see the benefit of SSL drop us a line.

Feature image made by Got Credit licensed CC BY 2.0.

IPv6 Day 2016

Today is IPv6 day. IPv6 day aims to evaluate and promote public IPv6 deployment as it was designed to eventually completely replace IPv4.

We embrace IPv6 technology at Dogsbody Technology and want to help promote it, so we thought we’d write a blog post telling you why we think it’s great.

But first, what is IPv6?

IPv6 was invented to address the issue of IPv4 exhaustion. It allows for a much larger number of IP (Internet Protocol) addresses, which is what computers use to identify and communicate with one another over the internet. Once all of these addresses are taken, no one new would be able to connect to the internet. There are around 3.7 billion public IPv4 addresses, which are now virtually exhausted due to the ever growing number of computers and people who are connected to the web. Compare this with roughly 340 undecillion, or 340 trillion, trillion, trillion that you get with IPv6.

With IPv6 every human on the planet could use billions of addresses a second and we’d still not run out.

An IPv6 address is written differently and so needs different DNS records.  If you do a DNS query on www.dogsbodytechnology.com you will see two responses. A traditional A record that includes the IPv4 address and a new AAAA record that shows the IPv6 address:

www.dogsbodytechnology.com. 900 IN A 139.162.200.233
www.dogsbodytechnology.com. 900 IN AAAA 2a01:7e00::31:9003

IPv4 Addresses are in the format “ddd.ddd.ddd.ddd” where each “ddd” ranges from 0-255.

IPv6 addresses are in the format “hhhh:hhhh:hhhh:hhhh:hhhh:hhhh:hhhh:hhhh” where each “h” is the value 0-15 written in hexadecimal.

IPv6 addresses can also be shortened so that leading zeroes can be removed (like IPv4) and consecutive blocks of 0000 can be replaced by a double colon (::) e.g.

2a01:7e00:0000:0000:0000:0000:0031:9003
2a01:7e00:0:0:0:0:31:9003
2a01:7e00::31:9003

There are lots of fantastic guides explaining how computers understand and use these addresses that will do a much better job of explaining than we could hope for in a small blog post.

Advantages:

  • Won’t run out.
  • Routing is more efficient.
  • Makes address allocation and network management simpler.
  • Improved end-to-end connection, helping things such as file sharing and online gaming.

Disadvantages:

  • Makes addresses harder to remember for humans.
  • Can make it easier to track an individual’s use of the internet.
  • New hardware may need to be purchased.
  • It’s going to take a long time to transition fully.

Some of the above disadvantages are lessened and/or avoided with the use of a dual stack (running IPv4 and IPv6 side-by-side)

Regardless of the down sides, we’re big fans of IPv6, and all of our servers use it where possible.

There is even a chance that you’re using it right now to view this website.  Contact Us if you want to make sure future visitors can access your site over IPv6.

Certificate Authorities or how to trust over the internet

A common misconception we see all the time is that HTTPS is only useful for scrambling (encrypting) connections between you and a website, but this is only half of its potential.

So how do we know we are connected to Facebook’s servers when we access www.facebook.com?

HTTPS ensures this, by making two important aspects of security possible: encryption and authentication. It does this by sending additional data (SSL certificates) before each connection. This certificate tells the client how to encrypt their connection and which Certificate Authority will authenticate who they are.

A Certificate Authority is an entity that validates other digital certificates.  They do this by “signing” certificates (with each others keys) and creating a Chain of Trust between a website and the browser.

This is the chain of trust for https://www.dogsbody.com (feel free to check this yourself in your browser now)

CA_Hierarchy

  1. *.dogsbodytechnology.com
    The first certificate your browser receives is the site certificate. This certificate details all of the domains that it is applicable for, in this case any domain ending dogsbodytechnology.com. As well as an “Issued By” field which details the certificate that signed it, giving your browser the information to verify it.
    When setting up a secure website (HTTPS) one of the first steps is to get a certificate authority to sign your certificate. Their signature connects you to a root certificate which browsers and software knows it can trust.
    Comodo signed our certificate so our “Issued By” field points to them.
  2. COMODO RSA Domain Validation Secure Server CA
    This is one of Comodo’s many intermediate certificates. There can be multiple intermediate certificates in the certificate hierarchy however each extra hop reduces trust.
    This certificate is not known by the browser so the webserver should send this certificate (and all intermediate certs) with the site certificate. This is sometimes known as the certificate bundle.
    This certificate’s “Issued By” field links to the root certificate giving us the next link in the chain to verify this certificate.
  3. COMODO RSA Certification Authority
    This is a root certificate, it is stored locally on your operating system (OS) with other root certificates your OS trusts. These are the master certificates of certificate authorities who have been thoroughly authenticated so your browser can trust them definitively.
    Some products such as FireFox for example, provide their own selection of root certificates which is used over the operating systems.
    While each certificate stores the field “Issued By” to verify it, root certificates are Issued By themselves, so no further checking is possible or necessary, they are trusted absolutely. This is a Trust Anchor, the end of the verification process.

Now that the browser can link your certificate with a root certificate it knows it is talking to authorized servers for the site and the rest of the connection can continue.

We secure websites every week contact us today and see how we can help you.

What time is it? – About NTP

In this blog post we’ll talk about time, how it works, why it’s important to computers, and how NTP can be used to manage the time on computer systems.

“You may delay, but time will not.”
― Benjamin Franklin

Intro to NTP

NTP (Network Time Protocol) allows computers on a network to synchronise their system clocks, with accuracy of as little as a few milliseconds. It does this by exchanging packets over the network and performing calculations based on the contents of these packets. Here is a simplified breakdown of this process, where two systems A (client) and B (server), synchronise their time:

  1. System A inserts it’s current time into a packet, and sends this to system B
  2. Upon receiving the packet from system A, system B then inserts it’s current time into the packet and sends it back to system A
  3. When system system A receives this packet, it will use the contents of the packet to estimate the time difference between the systems
  4. System A will use this time difference to adjust the system time, so that it is in sync with system B

This is often repeated multiple times, with every iteration resulting in the times of the systems getting closer and closer together. The above steps assume that system B’s time is correct.

Why is NTP needed?

You may be wondering why computers go through so much “trouble” to synchronise their clocks, or why there is an entire protocol dedicated to it; people’s watches are often out by a couple of minutes, and they manage just fine, why are computers any different? Well that’s just it, computers are very different. The smallest unit of time most people use every day is seconds. They microwave their lunch for 45 seconds, they wait 40 seconds for their tea to brew, they call someone back in 30 seconds. That’s fine, and it doesn’t really matter if you cook your lunch for a few seconds longer, as not much happens in a second.

However, a second for a computer is a huge amount of time. A moderately powerful modern computer can perform 14,000,000,000 (that’s 14 billion) operations every second. So a one second disparity between the times on systems could result in an extra 14 billion operations taking place. To be completely fair, each of these many operations represents very little in the grand scheme of things, but the example still holds: computers are extremely time-sensitive.

What happens when system times are out of sync?

When the times on systems are out of sync, some really odd and horrible things can happen:

  • Logs on different systems won’t correspond to each other. Lets say your application breaks, and you want to look through the logs and see what the problem was. You know the issue happened at, for example, 03:17:54. When you check the logs, you look for the entries at 3AM and try to figure out what went wrong. What if one of the systems’ time is wrong? Even though a log entry says something happened at 3AM, you could actually be looking at what happened at 4AM. This can me manageable if you’re only comparing logs between 2 systems, but when you start dealing with more and more systems, this becomes impossible pretty quickly.
  • Tracing emails can become very difficult. When you send an email, chances are it passes through multiple servers before reaching its destination. If you want to debug an email issue, you’re probably going to be checking headers (additional bits of data transmitted with the message), which contain timestamps added by each server the email passes through. If the times are out of sync on the systems, it can make it really difficult to trace the path of a message.
  • CRON jobs could run at the wrong time. Let’s say you have a CRON job that runs at 9PM. Its purpose is to, for example, kick all users off of the system and backup their files from that day. But, what if the system time is wrong, and this CRON ends up running at 2PM instead? People would be kicked off of the system in the middle of the working day, potentially resulting in a big loss of data and/or productivity.
  • Authentication services can be affected. Lots of two-factor authentication systems work on the idea of a one-time password. This is usually calculated based on a shared secret key, and the current time stamp. In order to authenticate successfully, a user needs to input the one-time password that the server is expecting. What happens if the client and server’s system times are different? Authentication fails, because the server is expecting a different key than the one provided by the user.

How to set up NTP on a Linux system & why servers should use UTC regardless of time zone

Setting up a Linux system to synchronise its system clock is really easy, and we’d always recommend doing this, especially on servers.

First, make sure you have an NTP client installed on your system. Most systems will come with one installed by default. A lot of the servers we manage run Ubuntu, so I’ll show you how to check an NTP client is installed on an Ubuntu system. Run this command in a terminal:

dpkg --list | grep ntp

You should see the package ntp listed. If nothing is returned, then you don’t have an NTP client installed. You can install it by running the following command with root privileges

sudo apt-get install ntp

The most important thing to configure with NTP is which servers to synchronise time with. These are defined in the /etc/ntp.conf file. If you check this file, you’ll find lines looking like the following:

server 0.ubuntu.pool.ntp.org
server 1.ubuntu.pool.ntp.org
server 2.ubuntu.pool.ntp.org
server 3.ubuntu.pool.ntp.org

These lines specify which NTP servers should be used. We typically change these to use the “standard” UK time-servers, like so:

server 0.uk.pool.ntp.org
server 1.uk.pool.ntp.org
server 2.uk.pool.ntp.org
server 3.uk.pool.ntp.org

These servers are all members of the NTP pool project. The NTP pool is a collection of publicly accessible NTP servers, which anyone can join (though there are a few requirements). We at Dogsbody Technology Ltd actually have a number of our own servers in the pool, providing time synchronisation capabilities for everybody to use. This helps to keep everybody’s system times in sync.

If you’ve having issues with NTP, or anything else for that matter, on your servers, then please get in touch and we’ll be happy to help.

Feature image made by Sean MacEntee licensed CC BY 2.0